一、前言
在企业级开发中、我们经常会有编写数据库表结构文档的时间付出。现在大多项目关于数据库表结构文档状态:要么没有、要么有、但都是手写、后期运维开发,需要手动进行维护到文档中,很是繁琐、如果忘记一次维护、就会给以后工作造成很多困扰、无形中制造了很多坑留给自己和后人。所以 screw 就应运而生。本文主要以使用为主,项目基础为springboot。
目前已经支持的数据如下:
- MySQL
- MariaDB
- TIDB
- Oracle
- SqlServer
- PostgreSQL
- Cache DB(2016)
二、使用
首先搭建一个springboot基础项目
2.1 依赖引入
1
2
3
4
5
6
7
8
9
10
11
12
13
14
15
| <dependency>
<groupId>cn.smallbun.screw</groupId>
<artifactId>screw-core</artifactId>
<version>1.0.5</version>
</dependency>
<dependency>
<groupId>org.springframework.boot</groupId>
<artifactId>spring-boot-starter-jdbc</artifactId>
</dependency>
<dependency>
<groupId>mysql</groupId>
<artifactId>mysql-connector-java</artifactId>
<scope>runtime</scope>
</dependency>
|
2.2 配置数据源
这里演示使用了默认数据源,如果需要单独生成,也可以在生成方法中进行配置。application.yml文件如下:
1
2
3
4
5
6
| spring:
datasource:
driver-class-name: com.mysql.cj.jdbc.Driver
url: jdbc:mysql://127.0.0.1:3306/springboot?useUnicode=true&characterEncoding=utf8&serverTimezone=UTC&allowMultiQueries=true&useSSL=false
username: spring
password: spring#123
|
2.3 创建DocumentServer
DocumentServer.java
1
2
3
4
5
6
7
8
9
10
11
12
13
14
15
16
17
18
19
20
21
22
23
24
25
26
27
28
29
30
31
32
33
34
35
36
37
38
39
40
41
42
43
44
45
46
47
48
49
50
51
52
53
54
55
56
57
58
59
60
61
62
63
64
65
66
67
68
69
70
71
72
73
74
75
76
77
78
| @Service
public class DocumentServer {
@Autowired
DataSource dataSource;
/**
* 文档生成
*/
public void documentGeneration() {
/*//数据源
HikariConfig hikariConfig = new HikariConfig();
hikariConfig.setDriverClassName("com.mysql.cj.jdbc.Driver");
hikariConfig.setJdbcUrl("jdbc:mysql://127.0.0.1:3306/database");
hikariConfig.setUsername("root");
hikariConfig.setPassword("password");
//设置可以获取tables remarks信息
hikariConfig.addDataSourceProperty("useInformationSchema", "true");
hikariConfig.setMinimumIdle(2);
hikariConfig.setMaximumPoolSize(5);
DataSource dataSource = new HikariDataSource(hikariConfig);
*/
String fileDir = "E:\\workspace\\workspace(idea)\\spring\\boot\\42springboot-screw\\src\\main\\resources\\doc";
//生成配置
EngineConfig engineConfig = EngineConfig.builder()
//生成文件路径
.fileOutputDir(fileDir)
//打开目录
.openOutputDir(true)
//文件类型
.fileType(EngineFileType.MD)
//生成模板实现
.produceType(EngineTemplateType.freemarker)
//自定义文件名称
.fileName("自定义文件名称").build();
//忽略表
ArrayList<String> ignoreTableName = new ArrayList<>();
ignoreTableName.add("test_user");
ignoreTableName.add("test_group");
//忽略表前缀
ArrayList<String> ignorePrefix = new ArrayList<>();
ignorePrefix.add("test_");
//忽略表后缀
ArrayList<String> ignoreSuffix = new ArrayList<>();
ignoreSuffix.add("_test");
ProcessConfig processConfig = ProcessConfig.builder()
//指定生成逻辑、当存在指定表、指定表前缀、指定表后缀时,将生成指定表,其余表不生成、并跳过忽略表配置
//根据名称指定表生成
.designatedTableName(new ArrayList<>())
//根据表前缀生成
.designatedTablePrefix(new ArrayList<>())
//根据表后缀生成
.designatedTableSuffix(new ArrayList<>())
//忽略表名
.ignoreTableName(ignoreTableName)
//忽略表前缀
.ignoreTablePrefix(ignorePrefix)
//忽略表后缀
.ignoreTableSuffix(ignoreSuffix).build();
//配置
Configuration config = Configuration.builder()
//版本
.version("1.0.0")
//描述
.description("数据库设计文档生成")
//数据源
.dataSource(dataSource)
//生成配置
.engineConfig(engineConfig)
//生成配置
.produceConfig(processConfig)
.build();
//执行生成
new DocumentationExecute(config).execute();
}
}
|
2.4 测试
编写测试类:
1
2
3
4
5
6
7
| @Autowired
DocumentServer documentServer;
@Test
public void test() {
documentServer.documentGeneration();
}
|
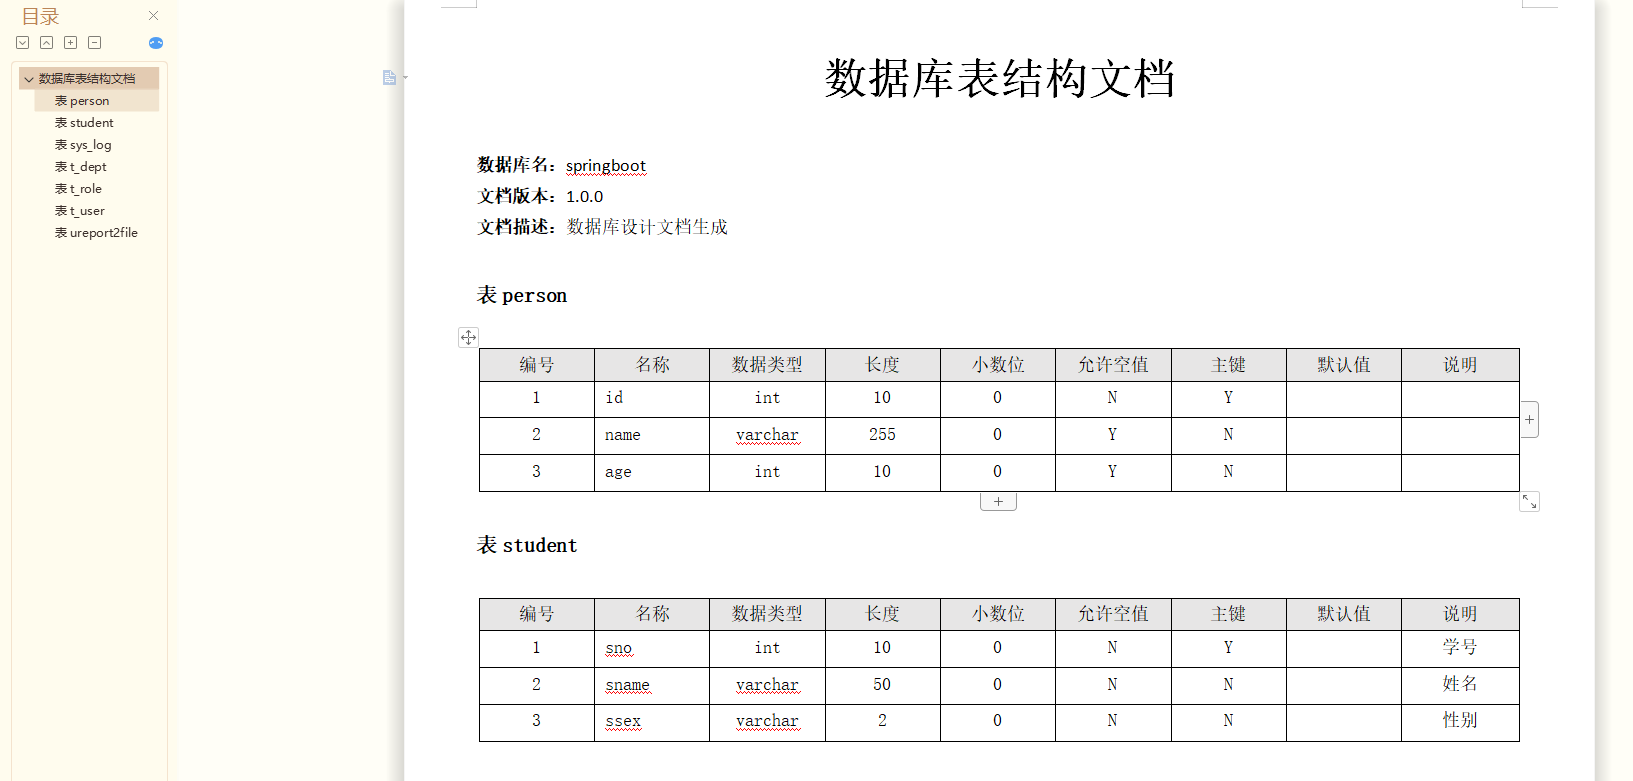
我们分别修改文件类型fileType,分别设置为 EngineFileType.MD、EngineFileType.WORLD、EngineFileType.HTML,测试生成文件如下:
![]()
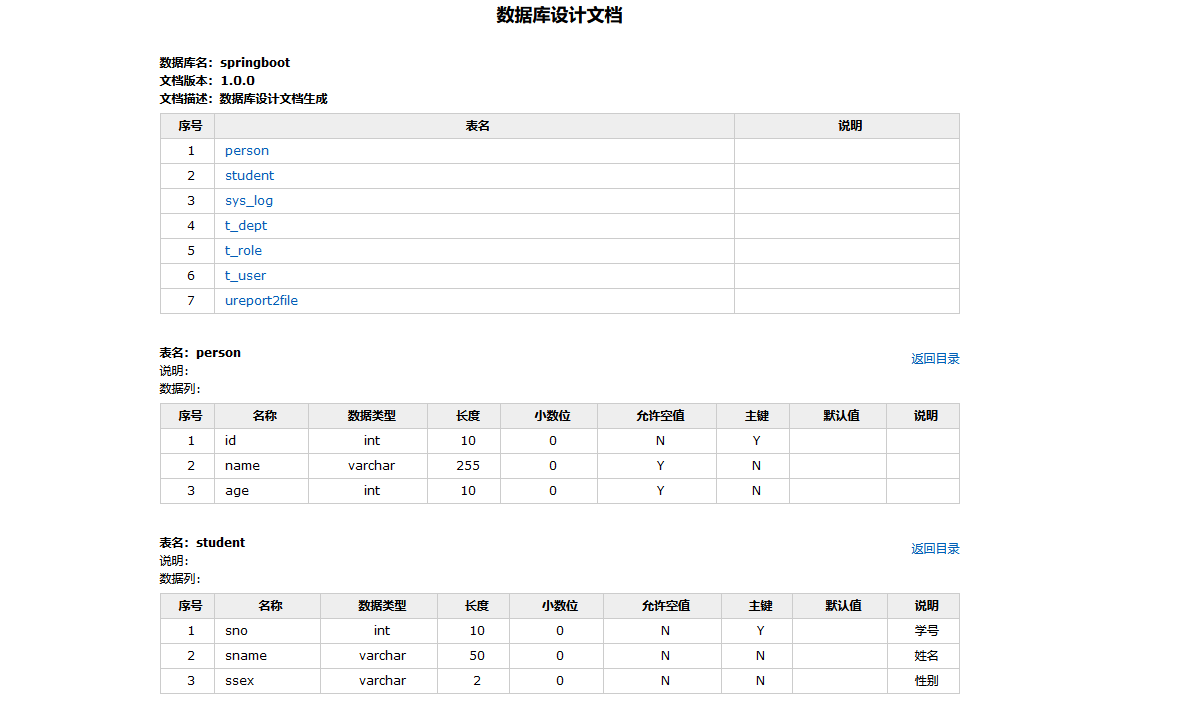
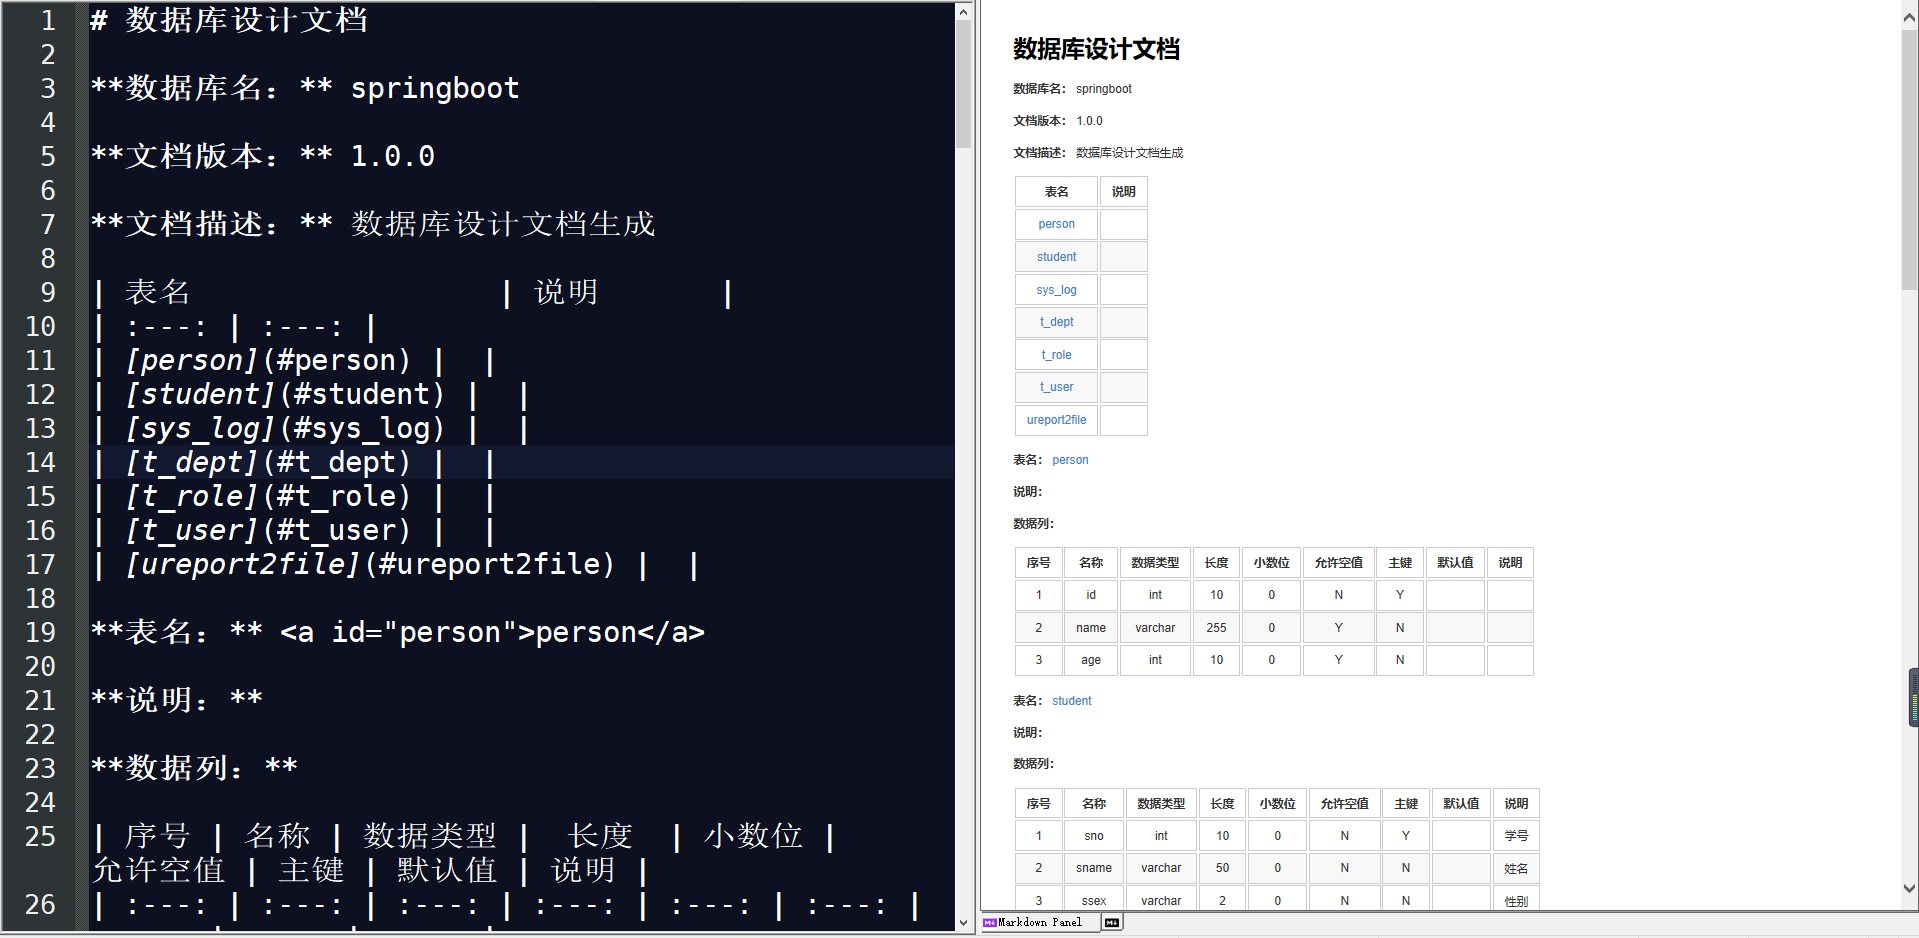
生成内容如下:
word
![]()
html
![]()
markdown
![]()