一、前言
Spring Security是一款基于Spring的安全框架,主要包含认证和授权两大安全模块,和另外一款流行的安全框架Apache Shiro相比,它拥有更为强大的功能。Spring Security也可以轻松的自定义扩展以满足各种需求,并且对常见的Web安全攻击提供了防护支持。如果你的Web框架选择的是Spring,那么在安全方面Spring Security会是一个不错的选择。
二、开启Spring Security
这里我们使用Spring Boot来集成Spring Security。
2.1 引入依赖
创建一个Spring Boot项目,然后引入spring-boot-starter-security:
1 | <dependency> |
2.2 测试
接下来我们创建一个TestController,对外提供一个/hello服务
1 | @RestController |
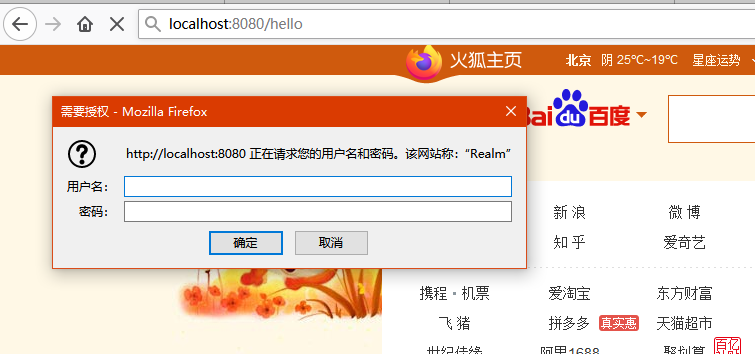
这时候我们直接启动项目,访问 http://localhost:8080/hello ,可看到HTTP Basic认证: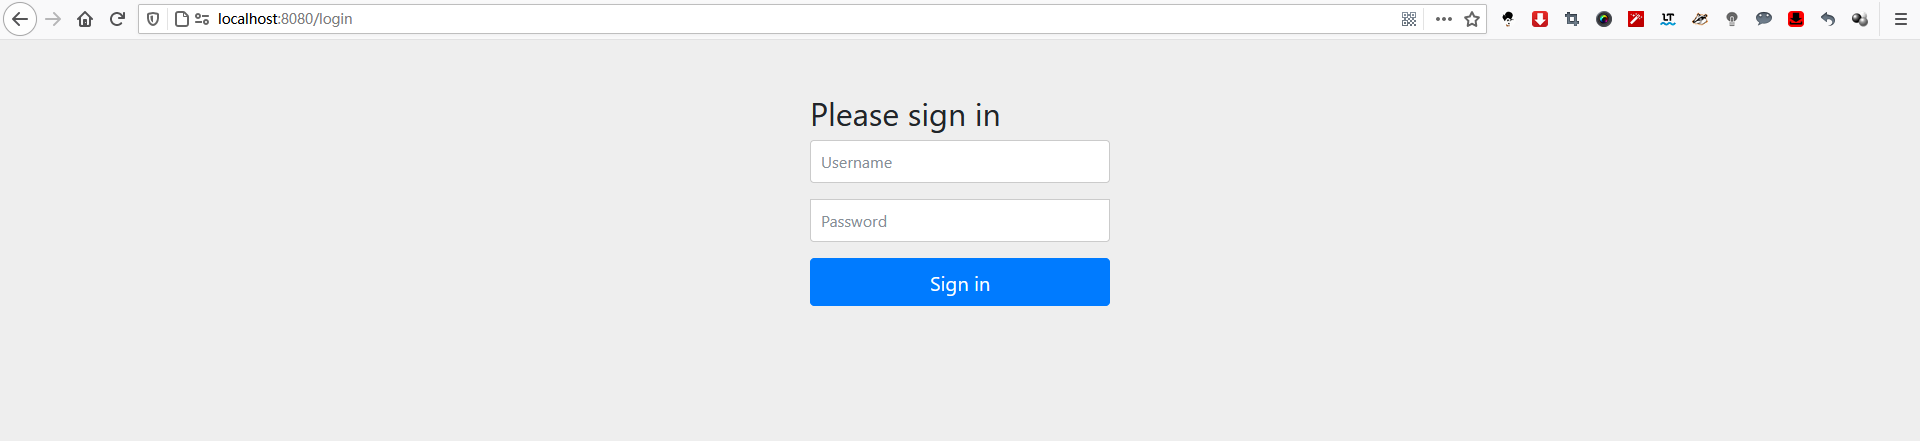
当Spring项目中引入了Spring Security依赖的时候,项目会默认开启如下配置:
1 | security: |
这个配置开启了一个HTTP basic类型的认证,所有服务的访问都必须先过这个认证,默认的用户名为user,密码由Sping Security自动生成,回到IDE的控制台,可以找到密码信息: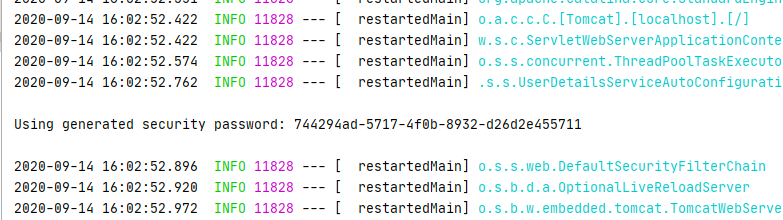
输入用户名user,密码620540a7-216c-452b-a479-4de9e0713e89后,我们便可以成功访问/hello接口。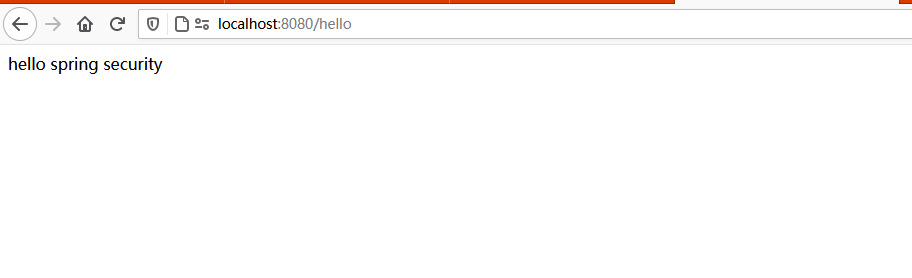
三、基于HTTP Basic认证
我们可以通过一些配置将基于表单认证修改为HTTP Basic的认证方式。
创建一个配置类BrowserSecurityConfig继承org.springframework.security.config.annotation.web.configuration.WebSecurityConfigurerAdapter这个抽象类并重写configure(HttpSecurity http)方法。WebSecurityConfigurerAdapter是由Spring Security提供的Web应用安全配置的适配器:
1 | @Configuration |
Spring Security提供了这种链式的方法调用。上面配置指定了认证方式为表单登录,并且所有请求都需要进行认证。这时候我们重启项目,再次访问Mhttp://localhost:8080/hello>,可以看到认证方式已经是HTTP Basic的方式了: