一、前言 在 《Spring-Boot-shiro用户认证》 中,我们通过继承AuthorizingRealm抽象类实现了doGetAuthenticationInfo()方法完成了用户认证操作。接下来继续实现doGetAuthorizationInfo()方法完成Shiro的权限控制功能。
授权也称为访问控制,是管理资源访问的过程。即根据不同用户的权限判断其是否有访问相应资源的权限。在Shiro中,权限控制有三个核心的元素:权限,角色和用户。
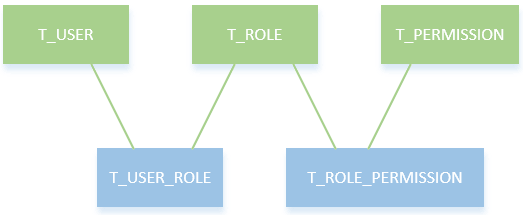
二、库模型设计 在这里,我们使用RBAC(Role-Based Access Control,基于角色的访问控制)模型设计用户,角色和权限间的关系。简单地说,一个用户拥有若干角色,每一个角色拥有若干权限。这样,就构造成“用户-角色-权限”的授权模型。在这种模型中,用户与角色之间,角色与权限之间,一般者是多对多的关系。如下图所示:
2.1 建表 根据这个模型,设计数据库表,并插入一些测试数据:
1
2
3
4
5
6
7
8
9
10
11
12
13
14
15
16
17
18
19
20
21
22
23
24
25
26
27
28
29
30
31
32
33
34
35
36
37
38
39
40
41
42
43
44
45
46
47
48
49
50
51
52
53
54
55
56
57
58
59
60
61
62
63
64
65
66
67
68
69
70
71
72
73
74
75
76
77
78
-- ---------------------------- -- table structure for t_user -- ---------------------------- drop table if exists `t_user`; create table `t_user` ( `id` int(11) not null auto_increment comment '主键', `username` varchar(64) character set utf8 collate utf8_general_ci not null comment '用户名', `passwd` varchar(128) character set utf8 collate utf8_general_ci not null comment '密码', `create_time` datetime(0) null DEFAULT NOW() comment '创建时间', `status` varchar(1) character set utf8 collate utf8_general_ci not null comment '是否有效 1:有效 0:锁定', primary key (`id`) using btree ) engine = innodb auto_increment = 1 character set = utf8 collate = utf8_general_ci row_format = dynamic; insert into `t_user` values ('2', 'test', '7a38c13ec5e9310aed731de58bbc4214', '2020-08-19 17:20:21', '0'); insert into `t_user` values ('1', 'wno704', '42ee25d1e43e9f57119a00d0a39e5250', '2020-08-19 17:20:21', '1'); -- ---------------------------- -- table structure for t_permission -- ---------------------------- drop table if exists `t_permission`; create table `t_permission` ( `id` int(11) not null auto_increment comment '主键', `url` varchar(256) character set utf8 collate utf8_general_ci not null comment 'url地址', `name` varchar(64) character set utf8 collate utf8_general_ci not null comment 'url描述', primary key (`id`) using btree ) engine = innodb auto_increment = 1 character set = utf8 collate = utf8_general_ci row_format = dynamic; insert into `t_permission` values ('1', '/user', 'user:user'); insert into `t_permission` values ('2', '/user/add', 'user:add'); insert into `t_permission` values ('3', '/user/delete', 'user:delete'); -- ---------------------------- -- table structure for t_role -- ---------------------------- drop table if exists `t_role`; create table `t_role` ( `id` int(11) not null auto_increment comment '主键', `name` varchar(32) character set utf8 collate utf8_general_ci not null comment '角色名称', `memo` varchar(32) character set utf8 collate utf8_general_ci not null comment '角色描述', primary key (`id`) using btree ) engine = innodb auto_increment = 1 character set = utf8 collate = utf8_general_ci row_format = dynamic; insert into `t_role` values ('1', 'admin', '超级管理员'); insert into `t_role` values ('2', 'test', '测试账户'); -- ---------------------------- -- table structure for t_role_permission -- ---------------------------- drop table if exists `t_role_permission`; create table `t_role_permission` ( `rid` int(11) not null comment '角色id', `pid` int(11) not null comment '权限id', KEY `t_role_permission_rid` (`rid`), KEY `t_role_permission_pid` (`pid`) ) ENGINE = InnoDB CHARACTER SET = utf8 COLLATE = utf8_general_ci COMMENT = '用户角色关联表' ROW_FORMAT = Dynamic; insert into `t_role_permission` values ('1', '2'); insert into `t_role_permission` values ('1', '3'); insert into `t_role_permission` values ('2', '1'); insert into `t_role_permission` values ('1', '1'); -- ---------------------------- -- table structure for t_user_role -- ---------------------------- drop table if exists `t_user_role`; create table `t_user_role` ( `user_id` int(11) not null comment '用户id', `rid` int(11) not null comment '角色id', KEY `t_user_role_user_id` (`user_id`), KEY `t_user_role_rid` (`rid`) ) ENGINE = InnoDB CHARACTER SET = utf8 COLLATE = utf8_general_ci COMMENT = '用户角色关联表' ROW_FORMAT = Dynamic; insert into `t_user_role` values ('1', '1'); insert into `t_user_role` values ('2', '2');
上面的sql创建了五张表:用户表T_USER、角色表T_ROLE、用户角色关联表T_USER_ROLE、权限表T_PERMISSION和权限角色关联表T_ROLE_PERMISSION。用户mrbird角色为admin,用户tester角色为test。admin角色拥有用户的所有权限(user:user,user:add,user:delete),而test角色只拥有用户的查看权限(user:user)。密码都是123456,经过Shiro提供的MD5加密。
2.2 实体 创建两个实体类,对应用户角色表Role和用户权限表Permission:
1
2
3
4
5
6
7
8
@Getter @Setter public class Role implements Serializable { private static final long serialVersionUID = -5440372534300871932L; private Integer id; private String name; private String memo; }
Permission:
1
2
3
4
5
6
7
8
@Getter @Setter public class Permission implements Serializable { private static final long serialVersionUID = -5440372534300871434L; private Integer id; private String url; private String name; }
2.3 Dao层 创建两个dao接口,分别用户查询用户的所有角色和用户的所有权限:
UserRoleMapper:
1
2
3
4
@Mapper public interface UserRoleMapper { List<Role> findByUserName(String userName); }
UserPermissionMapper:
1
2
3
4
@Mapper public interface UserPermissionMapper { List<Permission> findByUserName(String userName); }
2.4 xml 其xml实现:
UserRoleMapper.xml:
1
2
3
4
5
6
7
8
9
10
11
12
13
14
15
<?xml version="1.0" encoding="UTF-8"?> <!DOCTYPE mapper PUBLIC "-//mybatis.org//DTD Mapper 3.0//EN" "http://mybatis.org/dtd/mybatis-3-mapper.dtd"> <mapper namespace="com.wno704.shiro.mapper.UserRoleMapper"> <resultMap type="com.wno704.shiro.model.Role" id="role"> <id column="id" property="id" javaType="java.lang.Integer" jdbcType="NUMERIC"/> <id column="name" property="name" javaType="java.lang.String" jdbcType="VARCHAR"/> <id column="memo" property="memo" javaType="java.lang.String" jdbcType="VARCHAR"/> </resultMap> <select id="findByUserName" resultMap="role"> select r.id,r.name,r.memo from t_role r left join t_user_role ur on(r.id = ur.rid) left join t_user u on(u.id = ur.user_id) where u.username = #{userName} </select> </mapper>
UserPermissionMapper.xml:
1
2
3
4
5
6
7
8
9
10
11
12
13
14
15
16
17
<?xml version="1.0" encoding="UTF-8"?> <!DOCTYPE mapper PUBLIC "-//mybatis.org//DTD Mapper 3.0//EN" "http://mybatis.org/dtd/mybatis-3-mapper.dtd"> <mapper namespace="com.wno704.shiro.mapper.UserPermissionMapper"> <resultMap type="com.wno704.shiro.model.Permission" id="permission"> <id column="id" property="id" javaType="java.lang.Integer" jdbcType="NUMERIC"/> <id column="url" property="url" javaType="java.lang.String" jdbcType="VARCHAR"/> <id column="name" property="name" javaType="java.lang.String" jdbcType="VARCHAR"/> </resultMap> <select id="findByUserName" resultMap="permission"> select p.id,p.url,p.name from t_role r left join t_user_role ur on(r.id = ur.rid) left join t_user u on(u.id = ur.user_id) left join t_role_permission rp on(rp.rid = r.id) left join t_permission p on(p.id = rp.pid ) where u.username = #{userName} </select> </mapper>
数据层准备好后,接下来对Realm进行改造。
三、Realm 在Shiro中,用户角色和权限的获取是在Realm的doGetAuthorizationInfo()方法中实现的,所以接下来手动实现该方法:
1
2
3
4
5
6
7
8
9
10
11
12
13
14
15
16
17
18
19
20
21
22
23
24
25
26
27
28
29
30
31
32
33
34
35
36
37
38
39
40
41
42
43
44
45
public class ShiroRealm extends AuthorizingRealm { @Autowired private UserMapper userMapper; @Autowired private UserRoleMapper userRoleMapper; @Autowired private UserPermissionMapper userPermissionMapper; /** * 获取用户角色和权限 */ @Override protected AuthorizationInfo doGetAuthorizationInfo(PrincipalCollection principal) { User user = (User) SecurityUtils.getSubject().getPrincipal(); String userName = user.getUserName(); System.out.println("用户" + userName + "获取权限-----ShiroRealm.doGetAuthorizationInfo"); SimpleAuthorizationInfo simpleAuthorizationInfo = new SimpleAuthorizationInfo(); // 获取用户角色集 List<Role> roleList = userRoleMapper.findByUserName(userName); Set<String> roleSet = new HashSet<String>(); for (Role r : roleList) { roleSet.add(r.getName()); } simpleAuthorizationInfo.setRoles(roleSet); // 获取用户权限集 List<Permission> permissionList = userPermissionMapper.findByUserName(userName); Set<String> permissionSet = new HashSet<String>(); for (Permission p : permissionList) { permissionSet.add(p.getName()); } simpleAuthorizationInfo.setStringPermissions(permissionSet); return simpleAuthorizationInfo; } /** * 登录认证 */ @Override protected AuthenticationInfo doGetAuthenticationInfo(AuthenticationToken token) throws AuthenticationException { // 登录认证已经实现过,这里不再贴代码 } }
在上述代码中,我们通过方法userRoleMapper.findByUserName(userName)和userPermissionMapper.findByUserName(userName)获取了当前登录用户的角色和权限集,然后保存到SimpleAuthorizationInfo对象中,并返回给Shiro,这样Shiro中就存储了当前用户的角色和权限信息了。
除了对Realm进行改造外,我们还需修改ShiroConfig配置。
四、ShiroConfig Shiro为我们提供了一些和权限相关的注解,如下所示:
权限 解释 @RequiresAuthentication 表示当前Subject已经通过login进行了身份验证;即Subject.isAuthenticated()返回true。 @RequiresUser 表示当前Subject已经身份验证或者通过记住我登录的。 @RequiresGuest 表示当前Subject没有身份验证或通过记住我登录过,即是游客身份。 @RequiresRoles(value={"admin", "user"}, logical= Logical.AND) 表示当前Subject需要角色admin和user。 @RequiresPermissions (value={"user:a", "user:b"}, logical= Logical.OR) 表示当前Subject需要权限user:a或user:b。
要开启这些注解的使用,需要在ShiroConfig中添加如下配置:
1
2
3
4
5
6
7
8
9
10
11
12
13
14
15
16
17
18
@Bean public AuthorizationAttributeSourceAdvisor authorizationAttributeSourceAdvisor(SecurityManager securityManager) { AuthorizationAttributeSourceAdvisor authorizationAttributeSourceAdvisor = new AuthorizationAttributeSourceAdvisor(); authorizationAttributeSourceAdvisor.setSecurityManager(securityManager); return authorizationAttributeSourceAdvisor; } /** * 开启Shiro的注解(如@RequiresRoles,@RequiresPermissions),需借助SpringAOP扫描使用Shiro注解的类,并在必要时进行安全逻辑验证 * 配置以下两个bean(DefaultAdvisorAutoProxyCreator(可选)和AuthorizationAttributeSourceAdvisor)即可实现此功能 * @return */ @Bean public DefaultAdvisorAutoProxyCreator advisorAutoProxyCreator(){ DefaultAdvisorAutoProxyCreator advisorAutoProxyCreator = new DefaultAdvisorAutoProxyCreator(); advisorAutoProxyCreator.setProxyTargetClass(true); return advisorAutoProxyCreator; }
五、Controller 编写一个UserController,用于处理User类的访问请求,并使用Shiro权限注解控制权限:
1
2
3
4
5
6
7
8
9
10
11
12
13
14
15
16
17
18
19
20
21
22
23
24
25
26
27
写一个UserController,用于处理User类的访问请求,并使用Shiro权限注解控制权限: @Controller @RequestMapping("/user") public class UserController { @RequiresPermissions("user:user") @RequestMapping("list") public String userList(Model model) { model.addAttribute("value", "获取用户信息"); return "user"; } @RequiresPermissions("user:add") @RequestMapping("add") public String userAdd(Model model) { model.addAttribute("value", "新增用户"); return "user"; } @RequiresPermissions("user:delete") @RequestMapping("delete") public String userDelete(Model model) { model.addAttribute("value", "删除用户"); return "user"; } }
在LoginController中添加一个/403跳转:
1
2
3
4
@GetMapping("/403") public String forbid() { return "403"; }
六、前端页面 6.1 index.html 对index.html进行改造,添加三个用户操作的链接:
1
2
3
4
5
6
7
8
9
10
11
12
13
14
15
16
17
<!DOCTYPE html> <html xmlns:th="http://www.thymeleaf.org"> <head> <meta charset="UTF-8"> <title>首页</title> </head> <body> <p>你好![[${user.userName}]]</p> <h3>权限测试链接</h3> <div> <a th:href="@{/user/list}">获取用户信息</a> <a th:href="@{/user/add}">新增用户</a> <a th:href="@{/user/delete}">删除用户</a> </div> <a th:href="@{/logout}">注销</a> </body> </html>
6.2 user.html 当用户对用户的操作有相应权限的时候,跳转到user.html:
1
2
3
4
5
6
7
8
9
10
11
<!DOCTYPE html> <html xmlns:th="http://www.thymeleaf.org"> <head> <meta charset="UTF-8"> <title>[[${value}]]</title> </head> <body> <p>[[${value}]]</p> <a th:href="@{/index}">返回</a> </body> </html>
403页面:
1
2
3
4
5
6
7
8
9
10
<!DOCTYPE html> <html xmlns:th="http://www.thymeleaf.org"> <head> <meta charset="UTF-8"> <title>暂无权限</title> </head> <body> <p>您没有权限访问该资源!!</p> <a th:href="@{/index}">返回</a> </body>
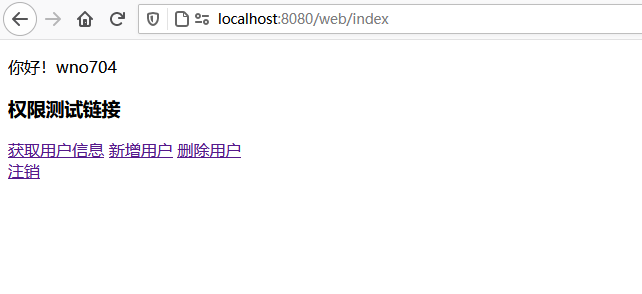
七、测试 启动项目,使用wno704的账户登录后主页如下图所示:
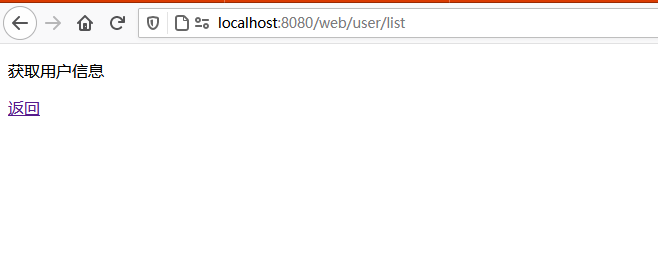
点击”获取用户信息连接”:
因为wno704角色为admin,对着三个链接都由访问权限,所以这里就不演示了。
接着使用test用户登录。因为test用户角色为test,只拥有(user:user)权限,所以当其点击”新增用户”和”删除用户”的时候:
后台抛出org.apache.shiro.authz.AuthorizationException: Not authorized to invoke method:…异常!!!
这里有点出乎意料,本以为在ShiroConfig中配置了shiroFilterFactoryBean.setUnauthorizedUrl("/403");,没有权限的访问会自动重定向到/403,结果证明并不是这样。后来研究发现,该设置只对filterChain起作用,比如在filterChain中设置了filterChainDefinitionMap.put("/user/update", "perms[user:update]");,如果用户没有user:update权限,那么当其访问/user/update的时候,页面会被重定向到/403。
那么对于上面这个问题,我们可以定义一个全局异常捕获类:
1
2
3
4
5
6
7
8
9
@ControllerAdvice @Order(value = Ordered.HIGHEST_PRECEDENCE) public class GlobalExceptionHandler { @ExceptionHandler(value = AuthorizationException.class) public String handleAuthorizationException() { return "403"; } }
启动项目,再次使用test的账号点击”新增用户”和”删除用户”链接的时候,页面如下所示: